Easy DIY | How to Make Dried Orange Ornaments
This easy DIY dried orange ornament tutorial is both beautiful and inexpensive. Whether you are an experienced DIYer or a beginner, I will show you how to make dried orange ornaments because they will add so much charm and simple beauty to your Christmas decor.
I’ve been busy getting our home decked for the upcoming holidays and it has been especially sweet this year. Things are slowly finding their places and I felt like it was time to do our yearly DIY- dried orange ornaments. I have made dried orange garlands for several years and I decided to mix it up and create orange ornaments for the Christmas tree.
One thing I love about this easy DIY is that it doesn’t break the bank… I love thrifty Christmas decor ideas! I like to make sure my decor has some longevity because I can’t keep rebuying things over and over again, but this simple DIY project marries simplicity and frugality and I love it.

Why make these easy DIY dried orange ornaments?
- They are a great beginners DIY because you really can’t mess them up. Even if you over dry them, they still have a charm to them.
- They are a great project for kids. I usually do the slicing and drying, but then my kids take over and string them. This year, they will attach the ornament hook so we can hang them.
- They are inexpensive. I love a quick, cheap project that offers oodles of style and beauty.
- Bring in the natural. These dried orange ornaments add some natural beauty to soften all of the faux happening. Plus, they look like mini stained glass ornaments.
What will you need for dried Orange Christmas Decor?
- Parchment paper on a cookie sheet
- Sliced oranges or other citrus fruit
- Ornament hooks- you can also use twine, ribbon, or wire to hang your ornaments
- For dried orange garland– twine is needed to string the dried orange slices
Tips and Tricks for Dried Orange Ornaments
- Slow and Low. Dried citrus takes time to fully dry without burning. Be prepared for these to take several hours. Most recipes (including mine) recommend 4 hours, but don’t stop short if yours need 4-6 hours before they are ready.
- Try other dried citrus ornaments or a dried citrus garland. Don’t stop with just oranges, make sure to try other dried citrus ornaments to add varying color and interest. I have seen dried blood red oranges and they are beautiful! Limes and grapefruit ornaments are lovely, as well.
- Pat them dry for several hours prior to drying in the oven. I place my orange slices in between towels to help soak up the extra moisture prior to drying them in the oven. I have also seen people slicing their oranges and allowing them to dry for several days (air dry) prior to drying them in the oven.
- Let them Rest. After the slices have dried in the oven, allow them to rest for an hour, or so, to finish curing.
Watch my Dried Orange Ornament tutorial
Steps to Make Dried Oranges
- Preheat oven to 200 degrees
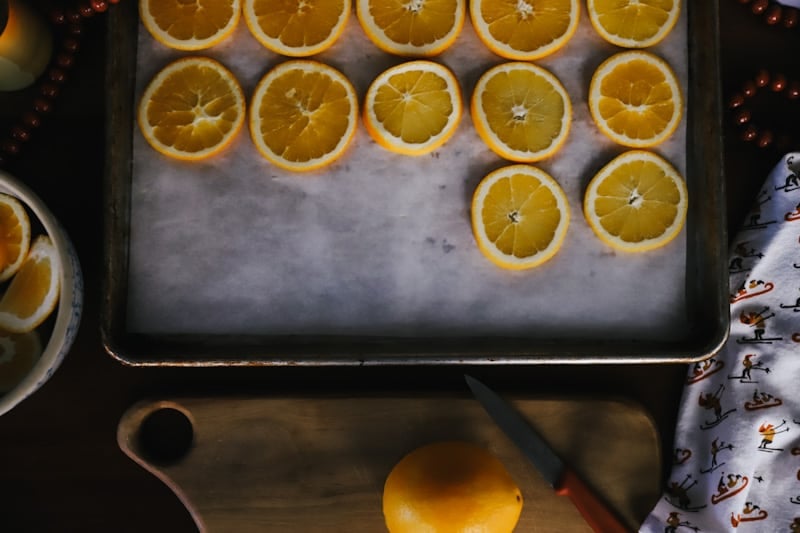
- Slice oranges thin (another tip is to use grapefruits, lemons, limes, etc. to have different colors)
- Place on a parchment lined baking sheet or on a wire rack on a cookie sheet
- Bake for 3-4 hours- be sure to flip oranges every 30 minutes to make sure they dry evenly. If you forget this step, it’s okay, they will still be fine.

More Christmas DIYs
Salt Dough Christmas Ornaments (we still hang these on our tree… I love them!)

DIY Dried Orange Ornaments
Ingredients
- 6 oranges
- ornament hooks
- parchment paper
- baking sheet
Instructions
- Thinly slice oranges
- Place on a parchment lined cookie sheet
- Bake in a preheated 200 degree oven for 3-4 hoursFlip every 30 minutes to make sure they dry evenly
- Place hook or twine in each slice once dried and hang on tree
Pin for Later:

Thank you for joining me for this easy DIY. Let me know if you make these dried orange ornaments for your tree!


is it 200 C or F? thanks